
You're in the living room with the tape still in your hand, and the client wants a number before you reach the truck. The room looks like a clean rectangle. The closet doesn't. The old vinyl might lift clean, or it might pull the underlayment with it. One lump-sum price makes every one of those surprises yours.
A flooring estimate template splits that risk before you talk. The measured floor and the transitions can be a fixed price the client can approve the same day. Subfloor repair and moisture work stay as capped allowances. Labor holds for a stated window. The material price holds only after the deposit that reserves the goods. Print the blank form before you measure a single room.
The Flooring Estimate Template and a Worked Total
Start with a filled page so every empty box has a number attached to it. Say the client points at a 500 sq ft rectangle and asks for a straight lay. Common estimating guidance puts waste at about 5–10% for simple straight-laid work, 10–15% for a diagonal layout, and 15–20% for herringbone, chevron, or a similar pattern, as Universe Estimating's flooring takeoff guide describes. At a 10% allowance that room needs 550 sq ft of material. Cartons that cover 20 sq ft each don't divide evenly, so you round up to 28 cartons, or 560 sq ft. That extra 10 sq ft is why the form keeps five quantity fields apart.
Quantity first, money second
The template is a measurement and quantity record, not a single price. Measure each room, multiply length by width, add closets and alcoves, apply waste, then convert to cartons. The same room-by-room sheet works for carpet, tile, laminate, hardwood, and resilient flooring, and the client can see the overage instead of hunting for it inside a lump sum.
On a straight-lay job of 1,000 sq ft priced at $3.00 per sq ft for material and $2.00 per sq ft to install, the page shows $3,000 of material and $2,000 of labor. That is $5,000 before removal, prep, trim, delivery, and tax. Labor is 40% of that combined subtotal. Two rooms with the same area will not match once one of them needs demo or fussy cuts.
Practical rule: If measured area, waste, adjusted quantity, package coverage, and purchase quantity share one cell, you can't explain the carton round-up when the client asks.
Header line, in this order: client, address, quote date, flooring type, SKU, and install window. Then the rows below, with a blank column beside the sample column so you can copy the set onto the next job.
| Field | What it records | Sample entry |
|---|---|---|
| Measured area | Net room square footage before waste | 500 sq ft |
| Waste percent | Layout and cut allowance | 10% |
| Adjusted quantity | Net area times one plus waste | 550 sq ft |
| Package coverage | Square feet per carton or roll | 20 sq ft |
| Purchase quantity | Adjusted area rounded up to whole packages | 28 cartons (560 sq ft) |
| Material price | Product unit price times purchase quantity | $3.00 per sq ft |
| Install labor | Setting rate kept off the material line | $2.00 per sq ft |
| Removal and prep | Demo, subfloor, moisture work | Allowance or hourly |
| Trim and transitions | Base, reducers, stair parts, underlayment | Linear or each |
| Tax, deposit, balance | Sales tax, amount due to start, remainder | Shown as three lines |
If this floor is only one trade inside a kitchen or bath remodel, use a wider sheet to plan kitchen and bathroom remodeling costs so the flooring lines don't get swallowed by cabinets and fixtures. The same habit of separating quantity from price shows up in a drywall estimate template, where board count and finish level stay visible instead of collapsing into one room price.
Copy those columns onto paper or into the estimate before the tape comes out. A blank header with an empty column next to the sample is the whole point of printing first.
How to Measure Each Room and Set Waste
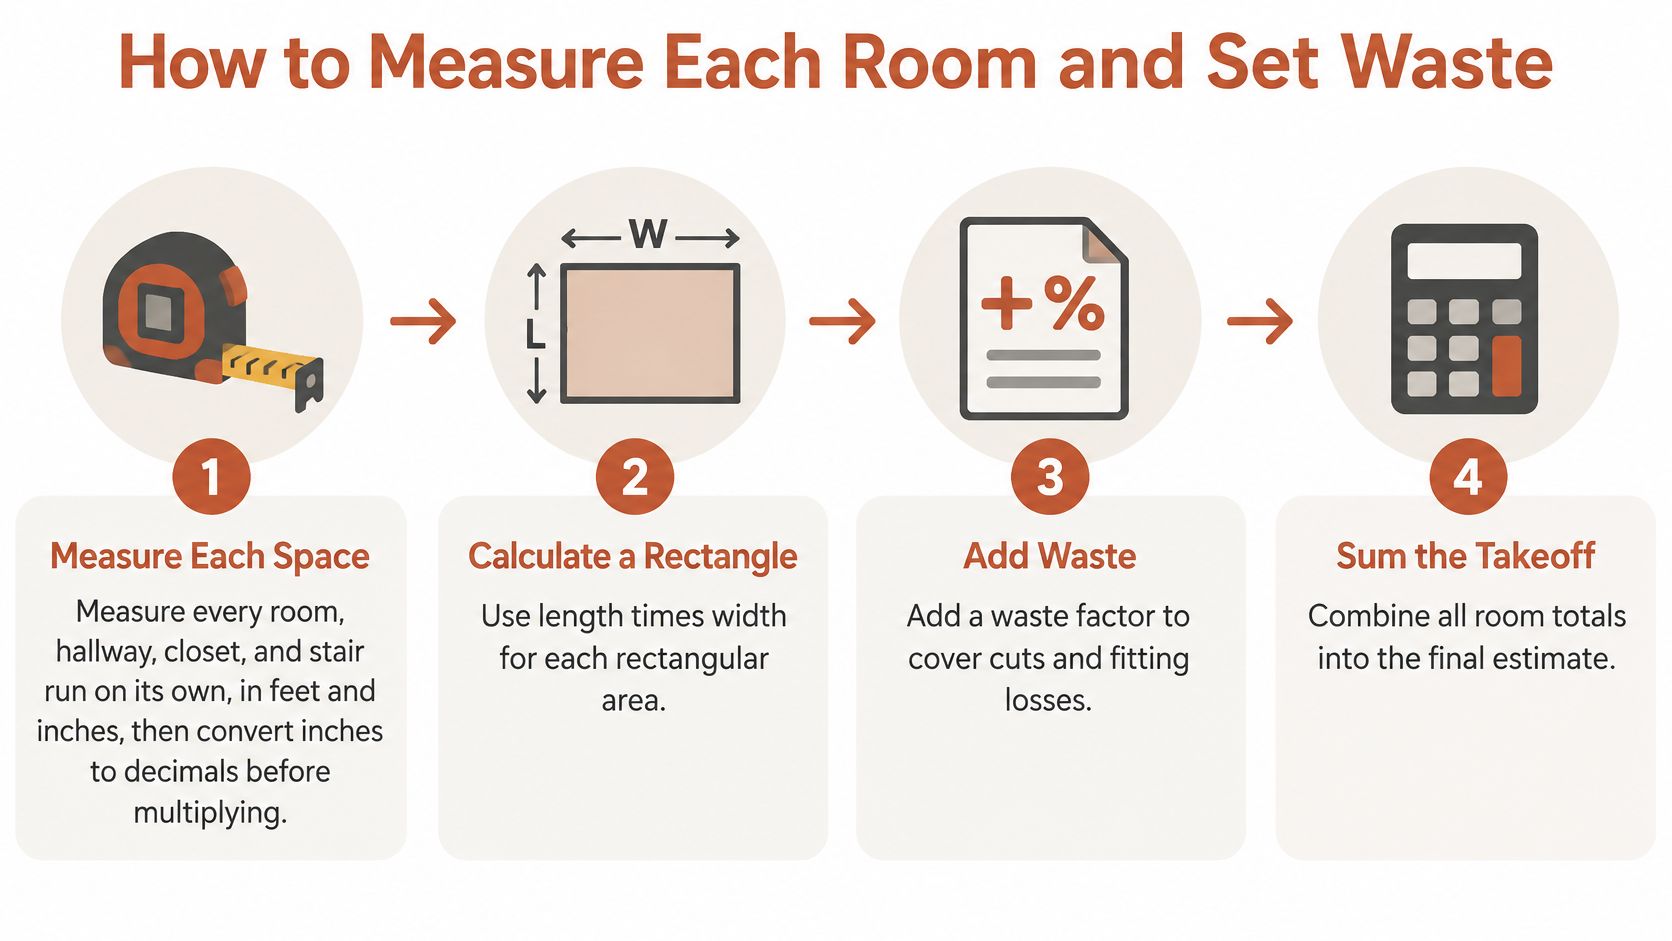
Walk the takeoff in order. Area math comes first. Waste is the next decision, not a habit you paste onto every job.
- Measure each space alone. Room, hallway, closet, and stair run get their own line, in feet and inches. Convert inches to decimals before you multiply. Six inches is 0.5, not a guess you'll fix in the truck.
- Treat a rectangle as length times width. An L, a bay, or a jog gets split into rectangles, then added. Don't trace the perimeter and hope the area falls out.
- Keep square footage off the linear list. Baseboard, reducers, stair nosing, and transitions are their own rows. Underlayment, moisture barrier, adhesive, and fasteners don't belong on the floor-area line either.
- Note what changes labor, not area. Door undercuts, appliances that stay, and furniture the client will move don't shrink the net square footage. They change hours later, so write them in the margin.
- Pick waste from the layout. A flooring estimate template from SimplyWise uses a variable waste field: straight work is commonly budgeted at about 10%, diagonal layouts at about 15%, irregular rooms at 15–20%, and herringbone or chevron at roughly 20–25%.
- Write the formula on the estimate. Ordered quantity equals net area times one plus the waste factor, then round up to the next carton. The client should see usable floor area and purchasing allowance as two numbers.
- Photograph the sketch and attach it. A revision shouldn't restart the tape.
A 12-by-14 living room is 168 sq ft. A 4-by-5 closet is 20. Together that's 188 sq ft, and a 10% straight-lay allowance is about 207 sq ft before carton rounding.
The same four moves, measure, rectangle, waste, then sum, are easier to remember as a one-page flow.
Waste follows the cuts, not last month's job
One default waste percent hides pattern cuts inside a lump sum. When the client later swaps a straight plank for a chevron, you can't audit what changed. Flacks Flooring's room measurement guide is a useful cross-check for doorways and closets before you lock the net area.
| Layout | Waste to budget | When it applies |
|---|---|---|
| Straight lay | 5–10% | Simple rectangles, few cuts |
| Diagonal | 10–15% | Boards or tiles set at an angle to the walls |
| Irregular rooms | 15–20% | Alcoves, many doorways, angled walls |
| Herringbone or chevron | 15–25% | Patterned cuts and extra offcuts |
If the waste cell says "standard" and nothing else, a change order has nothing to stand on.
Record removal, subfloor repair, layout, cleanup, and punch-list time on labor rows, not inside the material quantity. The client is approving floor area plus a named allowance, not a mystery pad.
Price Labor from Output Not a Material Percent
A room's square footage sets the starting point for labor, not the whole price. Two rooms with equal area can take different hours if one needs extra layout work, tight door cuts, or a slower installation method. Keep material cost and labor as separate estimate lines so the client can see what each part covers.
Labor commonly accounts for roughly 30–50% of total residential flooring cost. Published installation ranges vary by product: carpet is approximately $0.50–$2.00 per sq ft, laminate about $1.50–$4.50 per sq ft, and tile or stone roughly $4–$14 per sq ft, depending on complexity, according to Stealth Agents' flooring staffing and cost notes. That spread is why a material markup alone cannot set a reliable labor charge.
Build the rate from hours
Start with the floor type, measured area, crew size, expected production, installation hours, and a fully loaded labor rate. The Flooring Cost Estimator guide lists approximate daily output of 300–600 sq ft for LVP, 250–400 for hardwood, 80–150 for tile, 400–600 for carpet, and 200–350 for sheet vinyl. Use these as starting ranges, then adjust to suit the pace and conditions of the job. For a metric comparison, hybrid flooring labour rates per m² provides a separate reference. The charge you set should reflect the time and costs involved, as explained in how much you should charge.
| Flooring | Install labor per sq ft | Approx. daily output |
|---|---|---|
| Carpet | $0.50–$2.00 | 400–600 sq ft |
| Laminate | $1.50–$4.50 | Set from your own laminate jobs |
| LVP | Fully loaded hourly rate divided by daily output | 300–600 sq ft |
| Hardwood | Fully loaded rate divided by daily output | 250–400 sq ft |
| Sheet vinyl | Fully loaded rate divided by daily output | 200–350 sq ft |
| Tile or stone | $4–$14 | 80–150 sq ft |
Small rooms take additional setup and layout time across less floor area. Complex patterns also add labor hours because cuts and alignment slow production. Add the expected extra hours to the labor line rather than applying a fixed percentage. Include wages, payroll taxes, workers' compensation, insurance, paid time off, vehicle and tools, overhead, and profit in the labor rate. A helper's base wage alone does not cover the cost of that labor.
Test the per-square-foot line against the day
Give mobilization, layout, floor protection, cleanup, and punch-list work separate labor lines. That makes the estimate easier to review and helps keep those hours from disappearing inside a broad installation charge.
Check the area against daily output before sending the estimate. A 400 sq ft LVP room at the slower end of 300 sq ft per day takes more than a day once protection and punch-list work are included. If the hours do not support the per-square-foot installation line, revise the labor amount or break out the additional tasks. Clear, itemized lines show the client what is fixed in the scope and give you a defined basis for pricing extra work.
Allowances for Subfloor Moisture and Demo
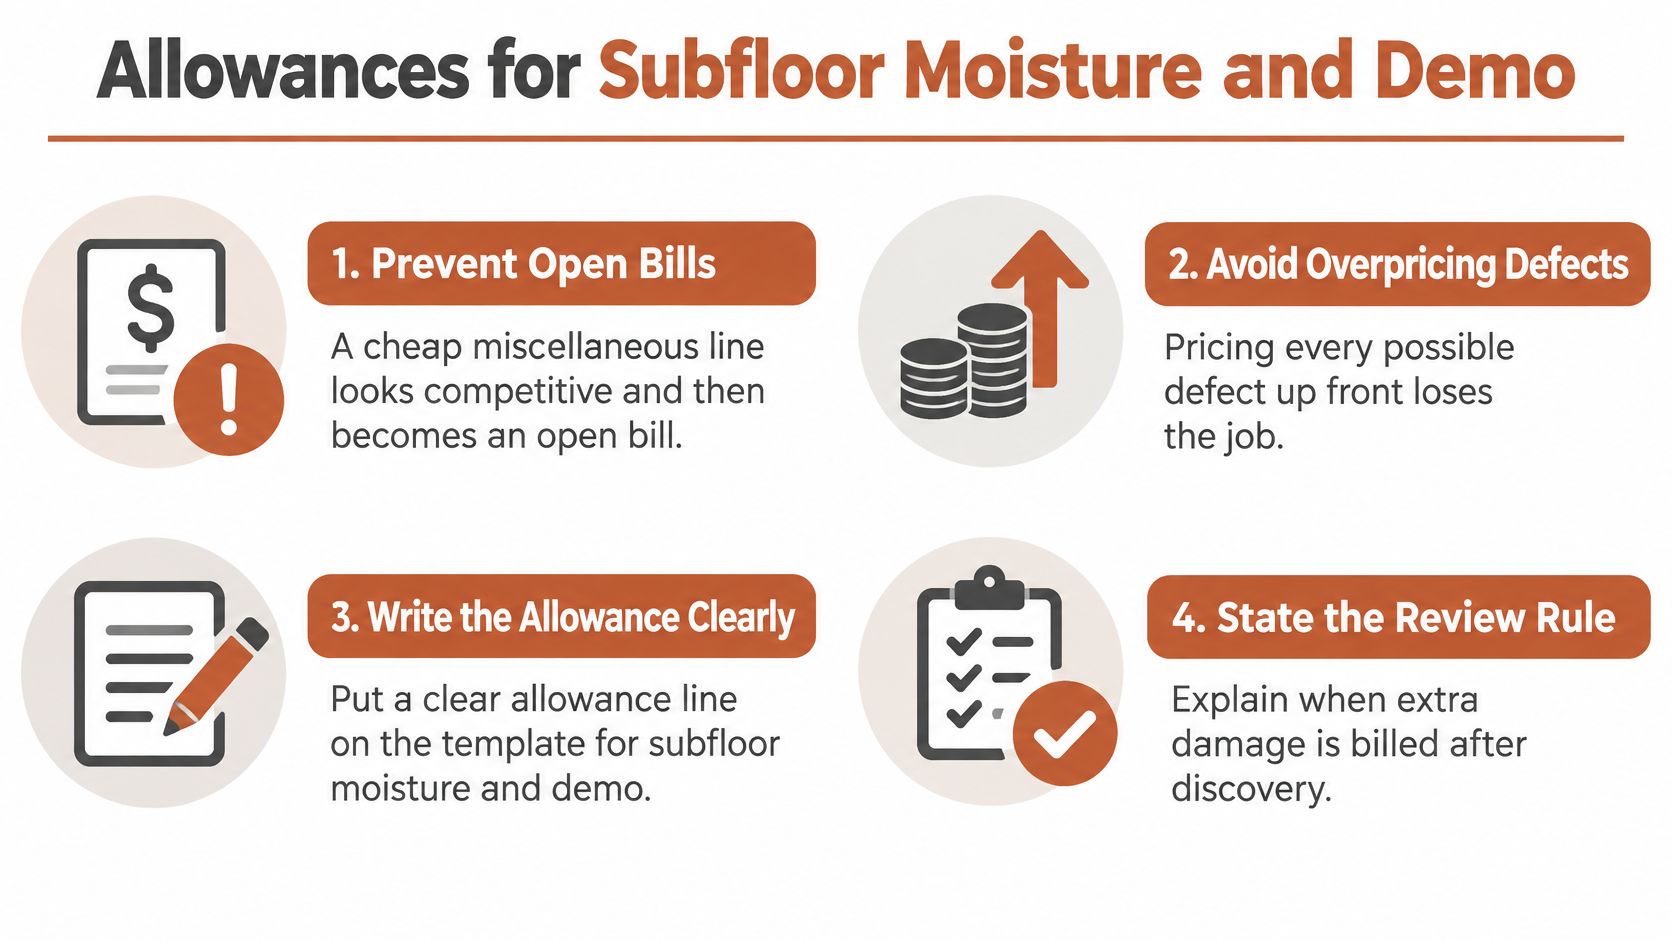
A kitchen floor can look ready for installation until the first board comes up and exposes soft spots or a damp slab. A low miscellaneous line may win the job, then become an open bill. Pricing every possible defect upfront can also cost you the work. The estimate should make clear what is fixed, what is a capped allowance, and what is excluded.
Subfloor condition, moisture, demolition difficulty, and moving furniture or appliances may remain unknown until work starts. Use a flooring contractor estimate template to separate those risks from the measured scope, rather than burying them in an unlabeled extra.
Four controls on one slab
Start with the condition your price assumes: existing vinyl lifts clean, and the slab reads dry on the meter used that morning. Put the assumption in writing, then define what happens if the site differs.
- Write the assumption. State, “Vinyl lifts clean. Slab reads dry.” If either condition is false on installation day, the estimate should point to the allowance or approval process, not an improvised price.
- Cap the unknown. Name the prep hours or per-square-foot rate for moisture mitigation. “Up to four hours of skim and fastener pop” sets a limit. “Extra prep as needed” leaves the client without one.
- Require written approval past the cap. Stop when the included prep is used. Get approval for additional work before continuing, rather than grinding while the client is away.
- Attach the evidence. Include photos of the vinyl, the meter reading, and a sketch marking soft spots with the estimate. The client can then compare the stated assumption with the observed condition.
Keep the scope in three clear categories:
- Fixed: measured floor, counted transitions, and base already included in the estimate.
- Capped: moisture mitigation or demolition, limited to the stated hours or per-square-foot rate.
- Excluded: furniture moving, painting, and unseen rot. Excluded work is outside the price, not work you agree to absorb.
A readable cap gives the client a defined limit to approve, while an open-ended allowance leaves the cost unresolved.
Keep the measured floor at a fixed price, and use an allowance only for the named quantity of uncertain prep. If the work exceeds that cap, pause and get approval for a change order before proceeding. That division keeps the quote clear for the homeowner and protects your schedule from unpriced work.
Lock the Price, Send It, and Collect the Balance
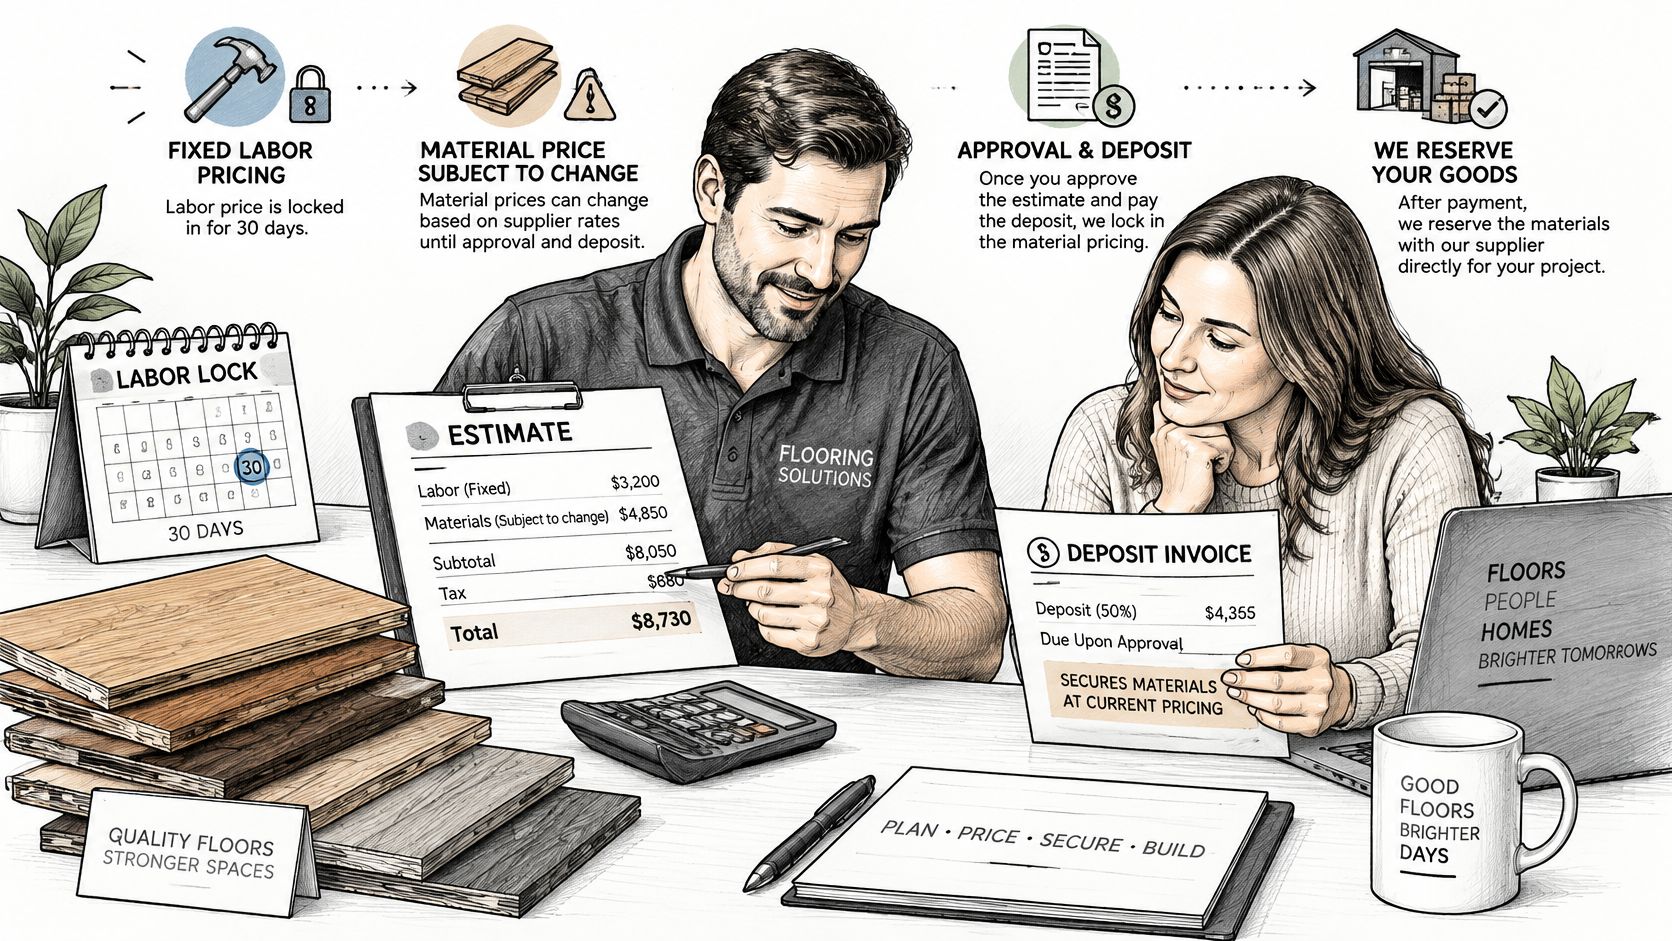
Labor stays fixed for 30 days. Materials stay subject to the supplier until the client approves and pays the deposit that reserves the goods. The only reprice trigger is a supplier increase before that deposit. A long open quote is convenient and it can wipe a one-person margin. A one-week quote protects you and loses people who need to talk to a partner. Conditional validity is the middle path, and Jobber's flooring estimate template is right to separate a price that locks after the deposit from a price that is only an estimate until the order is placed. Tariff swings, supply trouble, and volatility in lumber, PVC resins, and adhesives are why the material side can't float for a season.
Say it in one sentence above the signature: "Labor on this estimate holds for 30 days from the quote date. Material pricing holds when you approve and pay the deposit that reserves the product. A supplier increase before that deposit is the only reason this material price changes."
What sits on the page before anyone signs
Put the quote date, supplier quote or SKU, install window, stock status, and freight assumptions in the header. Then one page of lines, in this order.
- Labor: the fully loaded install, plus mobilization, layout, protection, cleanup, and punch list as their own rows.
- Materials: purchase quantity from the takeoff, unit price, and the supplier quote you named.
- Removal: only the demo you have already capped or fixed.
- Trim: base, reducers, stair parts, underlayment.
- Exclusions, as sentences: "Furniture moving is not included. Painting is not included. Unforeseen rot is not included."
- Tax: its own line, not folded into the plank price.
- Deposit: a percent or a flat amount tied to materials or a reserved date. We set that expected deposit on estimates when the work needs materials or a date you can't give to someone else.
- Balance: due at completion, after the deposit is credited.
Paste the validity sentence above the signature. Terms that need a signature beyond the price belong in a separate contract, which is what an estimate terms and conditions page is for. The estimate itself is the price and the scope.
From the yes to the remaining balance
The client approves in the browser, no login required. You open the accepted estimate and choose Convert to invoice. Approved lines become the invoice without retyping. The deposit is credited. You bill only the remainder. The client pays by card, ACH, QR code, or a check or transfer you record. The signed agreement stays on that same client record, and the converted estimate stays linked to the invoice it created.
If the scope changes before acceptance, edit the same estimate and resend it. A second quote creates two totals and an argument. The activity log shows each view and each payment, so you follow up when they've opened it and gone quiet, not on a random Tuesday.
Ordering cartons before the deposit is how a locked labor price still loses money. Send one real room as the link. Collect the deposit. Then call the supplier.
Print one blank flooring estimate template tonight and price a single room you already know, with waste, a labor line built from hours, and one capped prep allowance. When you're ready to send it, approve it, and collect the deposit without rebuilding the invoice, try a free AurenWell template at AurenWell and keep the signature, the deposit, and the balance on one client record.